Translate Request has too much data
Parameter name: request
Translate Request has too much data
Parameter name: request
28 Jul
Posted by Feefs in Gumpaste Flowers
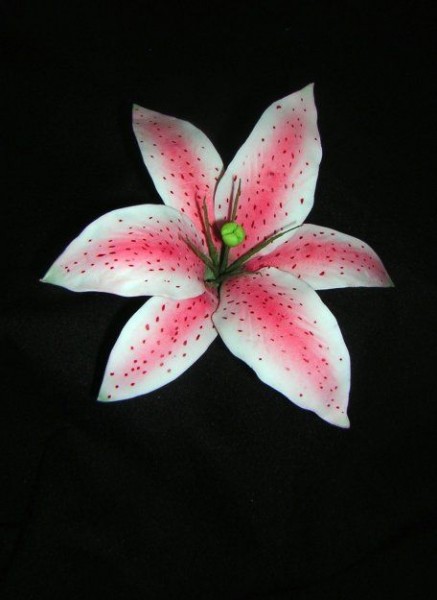
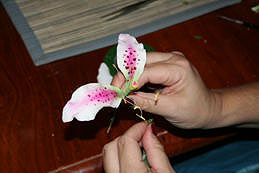
HOW TO MAKE A GUMPASTE STARGAZER LILY (Asian Lily)
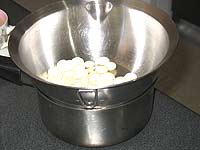
Photo by Avaie
 Equipment needed:
24/26g wire (white taped)
Thin wire (
very thin)
Thick glue (cellogen/tylose etc)
Ground rice/Rice flour – coloured
Lily cutter & veiner
Mould for drying petals
Scalpel / exacto knife
Rolling pin
Balling tool
Buttercup Yellow Luster Dust
Orchid Pink Luster Dust
Tweezers
* note, I use white wire as
the petals are quite fine and green would show through.
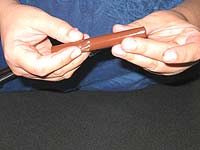
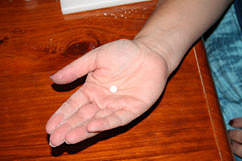
 Pistol
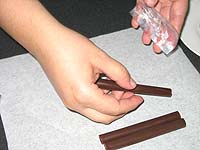
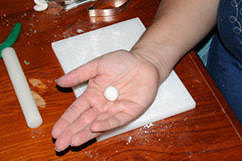
To start with take a small ball
of paste & roll it into a sausage shape.

Once you have a the start of
the sausage shape insert 24/26g wire up the full length of the
sausage making sure you do not pierce the end.

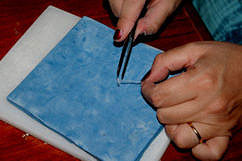
Work the sausage on the wire,
working it down the wire to make sure it has a firm hold.
There is no need to glue the wire before this step. You can roll
with your hand, or alternatively use your balling mat as shown –
this ensure that the pistol is straight and has no “finger grooves”
from your rolling.

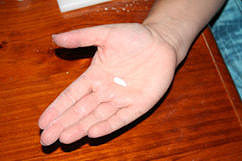
Once it has thinned out
nicely, measure it up to the length of the petal cutter – it needs
to be no bigger than 1/2 the size of the largest cutter – this gives
balance – anything longer than half will look odd. With your
scalpel cut a top of the stamen with three cuts – like the “peace”
symbol. – sorry tried to photograph this but it was too fine to show
up.
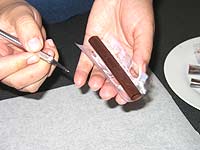
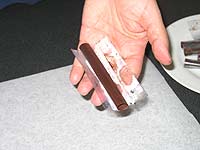
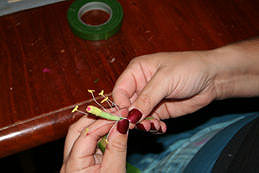
 Stamens
With the very fine wire – is
finer that what you normally use, it is very very flexible and
covered in cotton – most cake decorating stores will stock this.
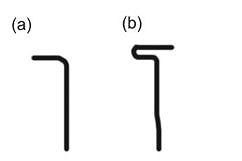
Cut 6 pieces approximately 10cm long.

With your tweezers bend about
1cm from the end so it looks like a number 7.(see diagram (a))
Then at about 1/3 along from
the bend, bend it back on itself (see diagram (b)).

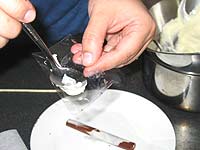
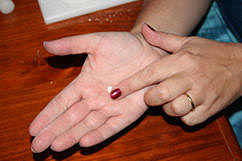
With the thick glue, dip the
end of the stamen into the coloured ground rice (I have mine yellow,
but if you look at real lilies, the stamens come in a multitude of
colours). Shake off any excess.
 Petals
Roll out your paste, and cut out
3 small petals and 3 large petals. Make sure you don’t roll
the paste too thin – this is a flower that tends to look better if
it has a little thickness to it – and it will give you less
heartache with breakage if you don’t make them too fine when it
comes to colouring them.
Then take a very small piece
of paste and roll it into a ball.
Then roll it into a
teardrop/tiny sausage shape.

And thread with 24/26g wire
white wire.

Place this onto the dusted
base of your veiner and brush with a very small (and I mean very
small) amount of glue.

Place one of the pre-cut
petals over, dust the top of petal then cover with top of veiner and
press down firmly.

Gently remove the petal from
veiner and place on balling mat & ball the edges of the petal to
make gentle ruffles. Some of these lilies are naturally very
ruffly, others not quite so much – really up to you how frilly you
want to make them. You will need to make 3 smaller petals and
3 larger petals.


Find a container or shaping
tool to lay the petals on. Make sure the curve is not to
excessive or you will have great difficulty in holding the petals &
taping them later on. As you can see, I have used a very high
tech equipment of a Tupperware container! (I really liked the gentle
curve it gave the petals). So as you can see anything can be
used.At this point you
need to leave the petals overnight or in a very hot dry place to
dry. They need to be 100% dry before you go any further.

Now the fun begins! I
found the best way to colour with luster dust is to leave the petals on
the container that they have being laying on to dry. Some
people prefer to hold them by the wires, some with the petal in
their hands… I found that if I held the petals I would have
breakage. And yes, I broke one this way also – that is why we
should always make extras! This breakage, however, was care of
my 2 year old “helping”. Commercial lilies (ones you buy
pre-made) will more than likely only have 5 petals – is cheaper and
faster for them to make, however, the natural lily does have 6
petals. Unfortunately, this tutorial now has five petals! The
same principals apply, you just need to tape in an extra petal which
will become clearer as we go along. For the colouring – have a
look at some real flowers – they tend to have green/yellow at the
centre of the petal and colouring on the rest of the petal varies –
some with alot of colour, some only a smattering… I’ve gone half
way. After you have dusted the petals, there are two different
ways to create the dots. This example is done with dots of
food colouring gel with a broken toothpick (so it has a rough edge
rather than a point). The alternative is when you are steaming
the petals to use Orchid Pink Luster Dust and brush on a light layer
over the still tacky petals. This was how I did the first
petals in my photos folder. The dots are less obvious when
looking at them, and as you can see, hardly come up in photos at
all.

The pistal needs to be
coloured green/yellow from the base to up to about 2/3 of the length
of it. The last 1/3 needs to be dipped in thin glue/cellogen
and then dipped in the coloured rice flour mix. As for the
stamens, I have left them white for this particular flower, but
again, if you look in nature they can be pink, yellow, green – a
variety. To colour, paint them with coloured dipping solution
of your choice.
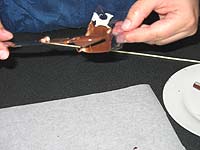
 Taping
Only use the glossy tape – not
the crepe paper type – it has a much better finish for this flower.
Firstly, tape down the length of the stamen wire to cover the green.
Then tape the stamens to the pistal (stamens DO NOT need additional
taping as you will have covered them). Take three stamens and
line them to the top of the pistal and tape around to hold in place.
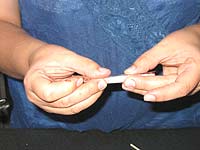
Take the next three stamens
and tape on the alternate side that you have just taped. Even
move the stamens around the pistal.

All the flower stems need to
be taped in green – this not only makes it look natural, but it
helps hold the wires together as you tape. Take one of the
small petals and bend to the desired effect with teasers.
Tape to the pistal/stamen
combo; then add the other 2 small petals so that they create a “Y”
formation.

The petals need to be secure.
To do this tape around the wires, then thread back through the
middle (between petal and pistal/stamens) and then continue taping
in the opposite direction. This is a little tricky, but you
will find it will hold the petals nice and securely. Once you
have taped the small petals, take the larger petals and tape as
close to the smaller petals in the gaps of the Y.
 Completed!
If this had six petals it
would look much better, however, it could pass as a lily – just not
competition level! Cut off the excess wire at the base leaving
a bit to bend and help “stand” into place on cake or plaque.
I hope this tutorial has
helped – I am by no means an expert and if there is anything that
needs to be clarified/explained better, please feel free to PM me.
View the original article here